How do you start a new survey and create a new questionnaire?
This article covers the following topics in detail:
- Starting a new survey;
- Creating a new questionnaire;
- Using the survey creator tool; and
- Saving your questionnaire.
Starting a new survey
You can click on the START A NEW SURVEY button from the dashboard to start a new survey. You will be directed to the Template List where you can either select on a template or create a new questionnaire to use for your survey.

Creating a new questionnaire
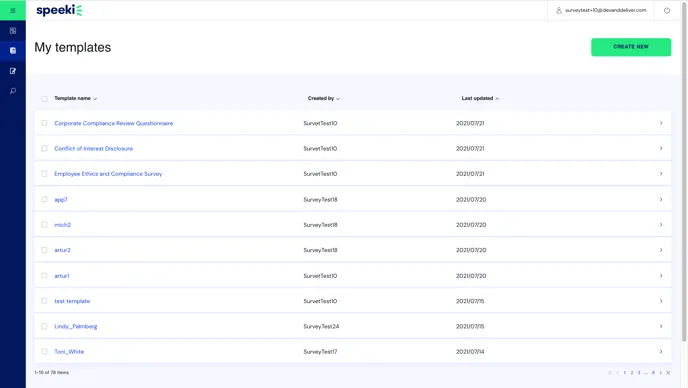
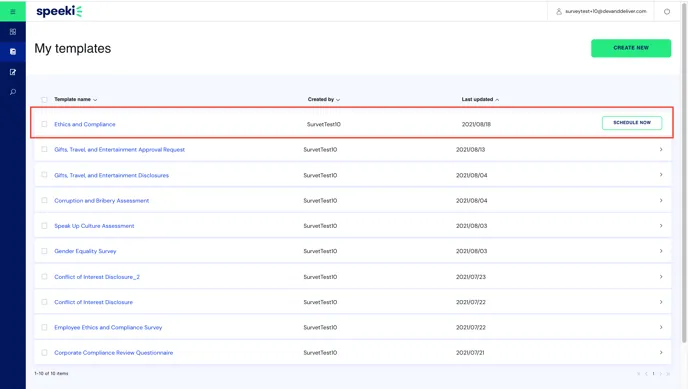
You can create a new questionnaire that you can use for your survey by clicking on the CREATE NEW button from the My Templates screen, or you can use any of templates on the list.
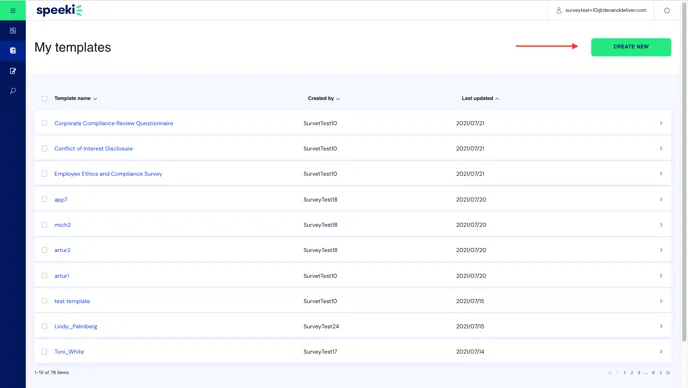
This will bring you to the screen for creating a questionnaire or the survey creator tool.

Using the survey creator tool
Naming the questionnaire and adding questionnaire description
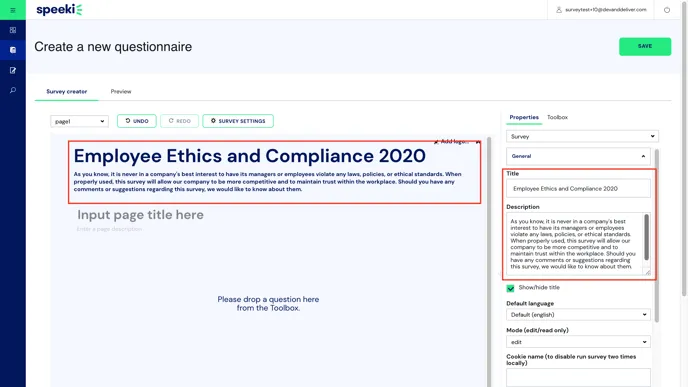
You can name your survey by clicking on Survey Settings or Properties.
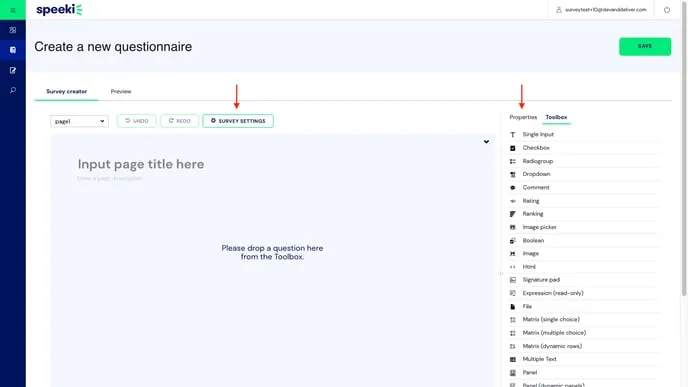
This will show properties that you can fill or configure for your questionnaire.
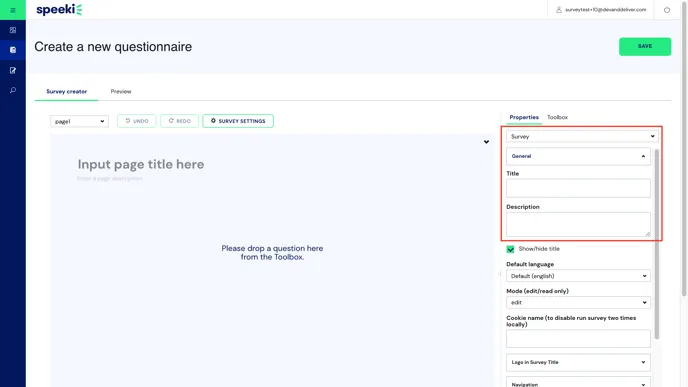
You can name your questionnaire by adding a value to the Title property and a description for your questionnaire by adding a value to the Description property.
Adding questions
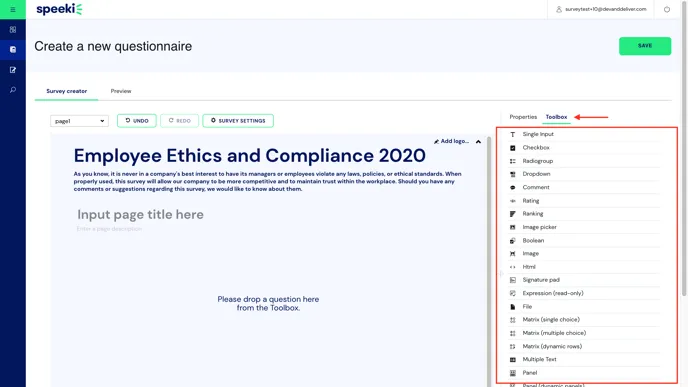
To add questions to your questionnaire, click on Toolbox. This will show a list of the type of questions you can include in your questionnaire.
There are twenty question types to choose from:
- single input;
- checkbox;
- radiogroup;
- dropdown;
- comment;
- rating;
- ranking;
- image picker;
- boolean;
- image;
- html;
- signature pad;
- expression;
- file;
- matrix (single choice);
- matrix (multiple choice);
- matrix (dynamic);
- multiple text;
- panel; and
- panel (dynamic).
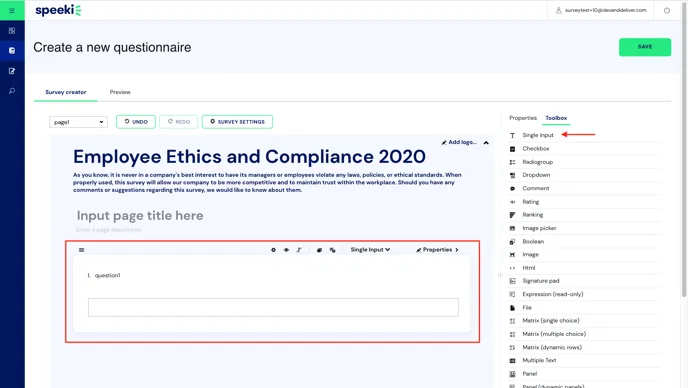
We will expound on each of these types in the succeeding sub-sections. To include a question to the questionnaire, you can click on the questionnaire from the Toolbox or drag it to the questionnaire canvas.
Adding a single input question
You can add a Single Input question type for questions that anticipate single input responses such as name, email, date, or other one liner text.
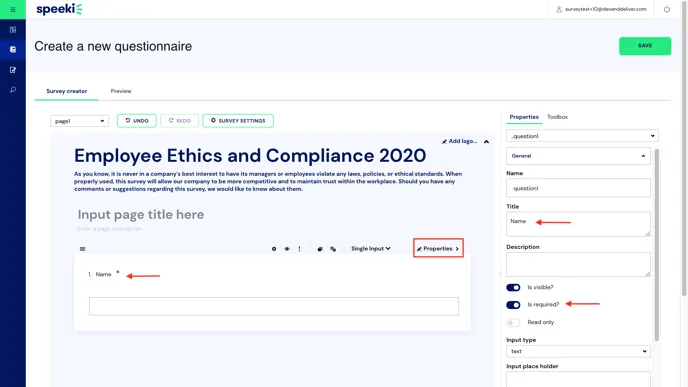
You can further configure a Single Input question type by clicking on Properties from the question. For example, you can define if the question you added is a required question. If so, you can toggle the option to make the question as required. This will require a survey participant to answer the question before submitting the survey.
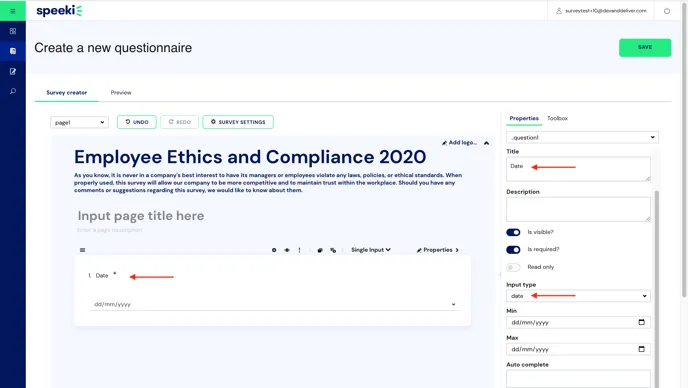
You can also change the input type of your question or your expected response from a participant. You can, for example, change the input type to a date input. Doing so will present a format for the input a date.
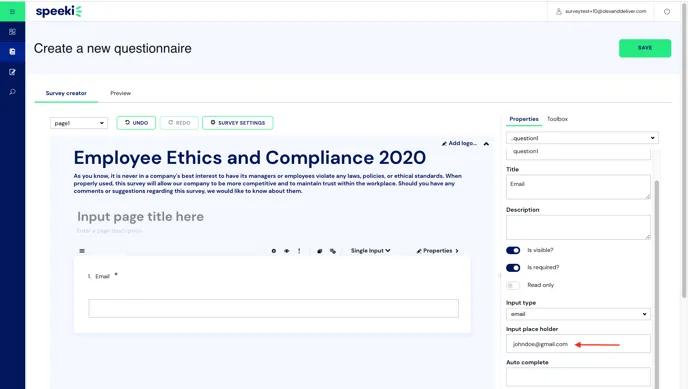
You can also set an input place holder for your question to guide your respondents. You can view a sample of how the place holder will look like when you look at your questionnaire in Preview mode.

Adding a checkbox question
You can add a Checkbox question type if you are allowing survey respondents to select multiple choices for your question.
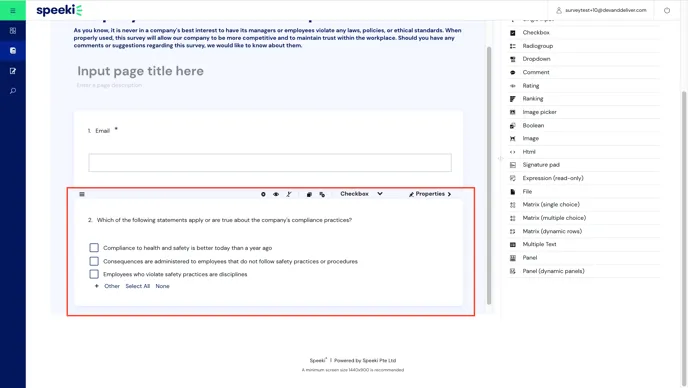
You can add additional options by clicking on + button.
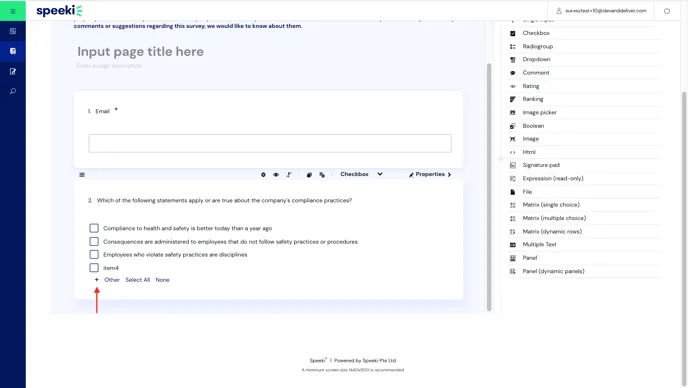
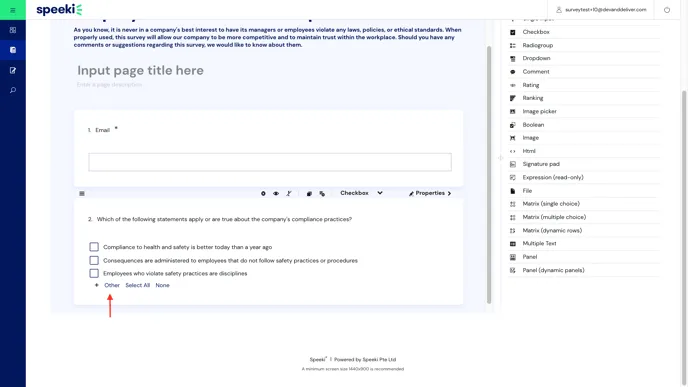
You can add a provision for respondents to provide their own answer by choosing Other.
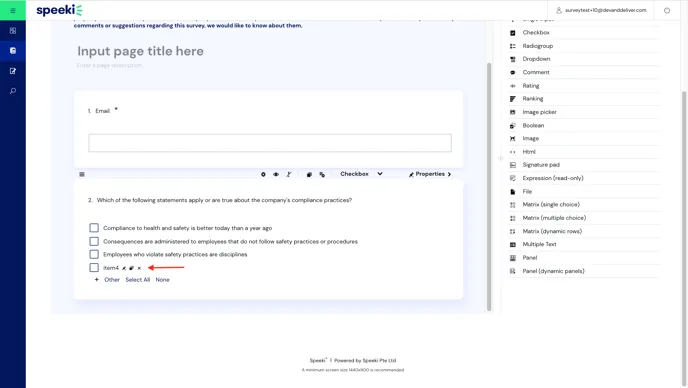
You can remove an option by hovering over it, this will show the Delete or x icon that you can click to remove the option from the list.
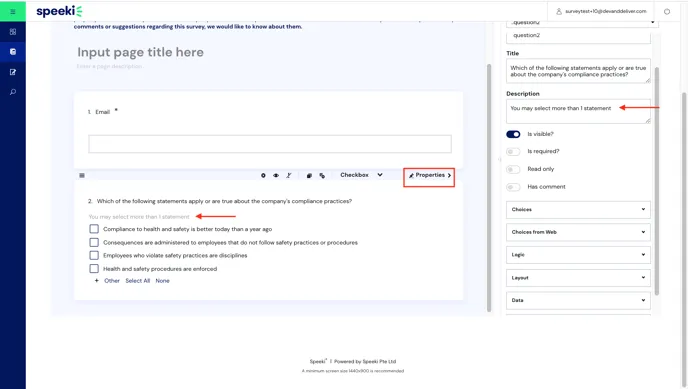
You can click on Properties to further configure the Checkbox question type. For example, you can add a Description that can help your respondents answer your question better.
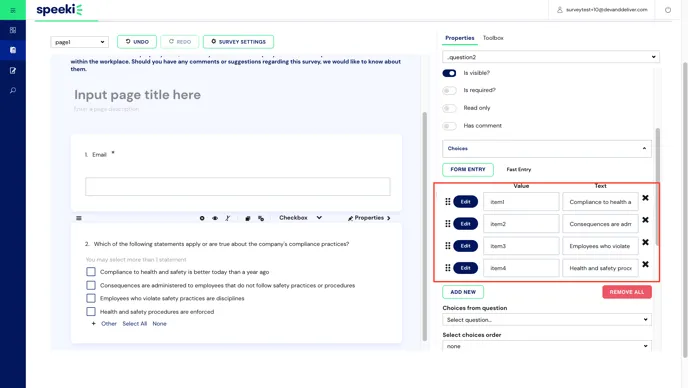
You can also edit the choices or options from the Properties panel if you wish to do so. Note that it’s the value in the Text field that appears in the survey. In the absence of a Text value, the survey will take the value that is in the Value field. Also, it is the value in the Value field that appears in real-time analytics.
Adding a radio group question
You can add a Radio Group question type if you are expecting the respondent to choose only one choice from a list of few choices.

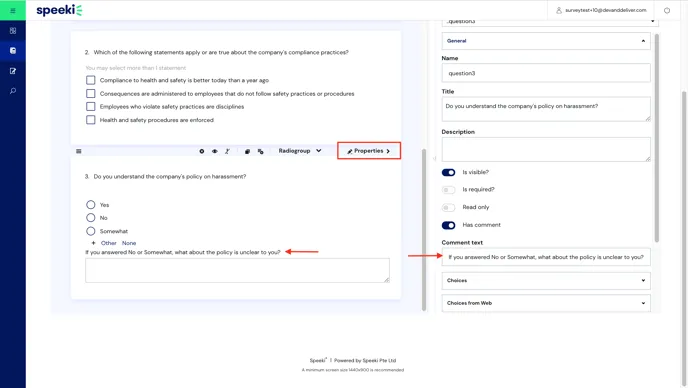
You can click on Properties to configure the Radio Group question type further. For example, you may want to add a field for Comments so your respondents can expound on their choice. You can do this by toggling on Has comment from Properties.
Adding a dropdown question
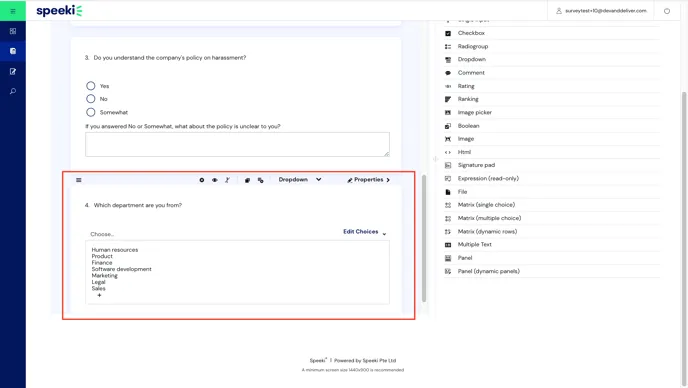
You can add a Dropdown question type if you are expecting the respondent to choose only one choice from a list of several choices.
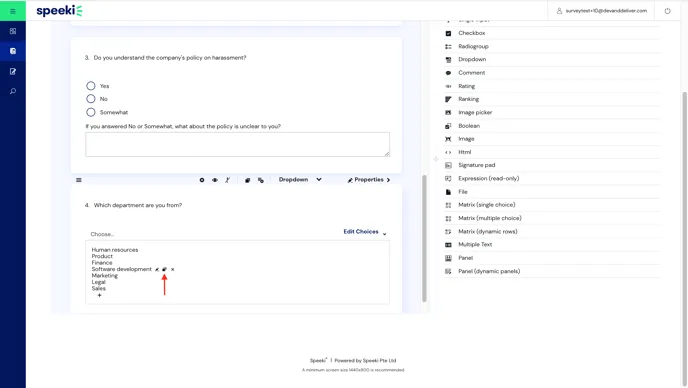
You can move the order of the choices by hovering over a choice and moving the Move icon that will appear beside it.
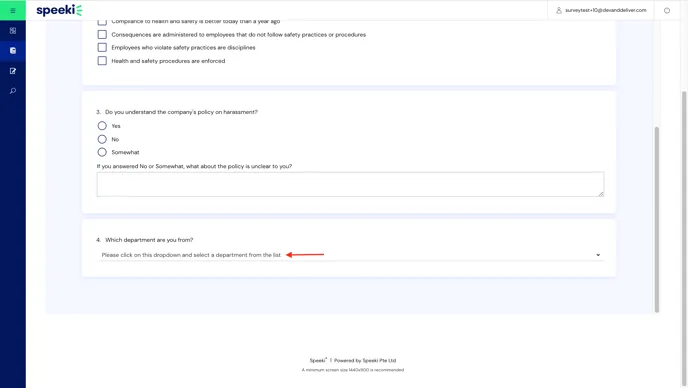
You can click on Properties to configure other properties of the Dropdown question type. For example, you can set an Options caption or placeholder for the question to better guide the respondents on how to answer the question.

The Options caption will look as follows in Preview mode.
Adding a comment question
You can add a Comment question type for questions that anticipate single input responses that may be longer than a single line text.

You can convert from a Comment question type to a Single Input question type by selecting Single Input from the dropdown. This will minimise the space for the response.
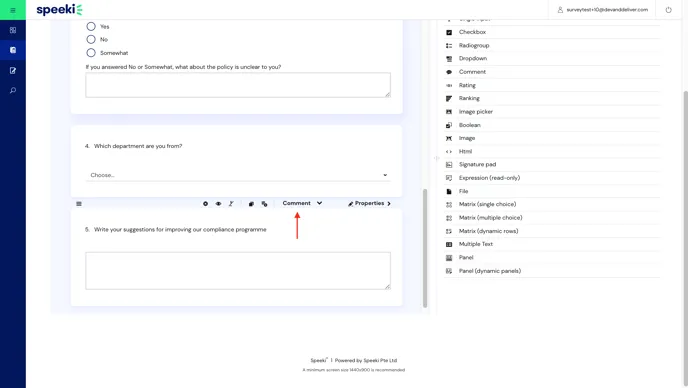
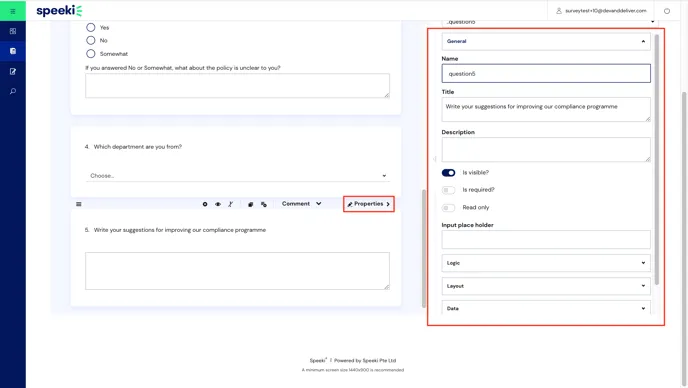
You can also click on Properties to configure other properties of a Comment question type.
Adding a rating question
You can add a Rating question type for questions that would ask respondents to compare different items using a common scale or rating. An example would be a scale of 1-5 or rating options of Never, Sometimes, Usually, Always.
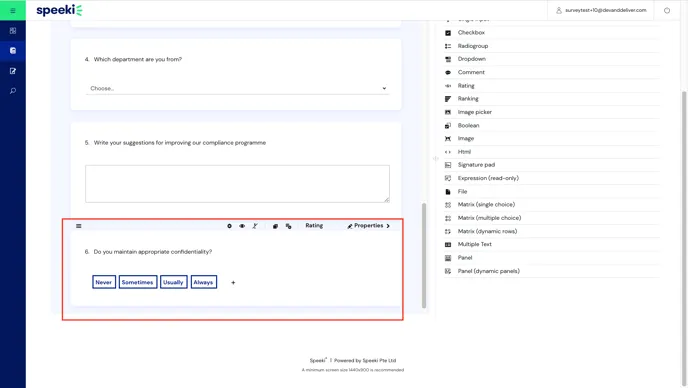
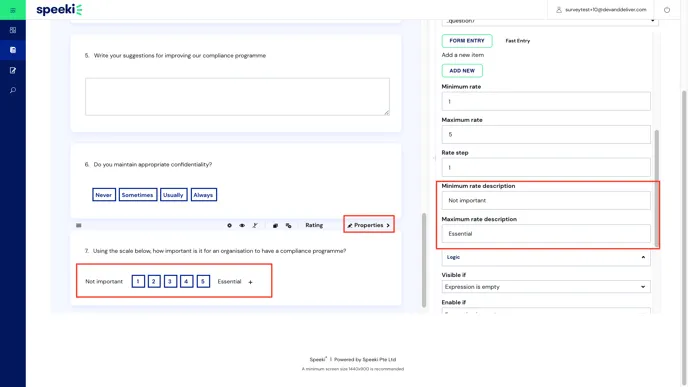
You can click on Properties to further configure other properties available for the Rating question type. For example, you may want to rating scale descriptions.
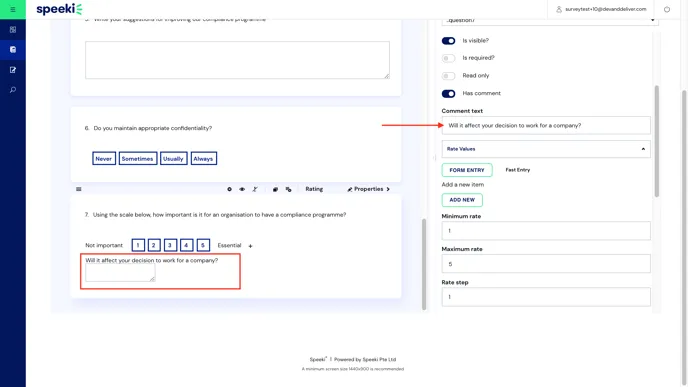
You can also configure Properties to add field for further comments for the question as seen below.
Adding a ranking question
You can add a Ranking question type for questions that would ask respondents to compare different items against each other, or rank them, using one scale

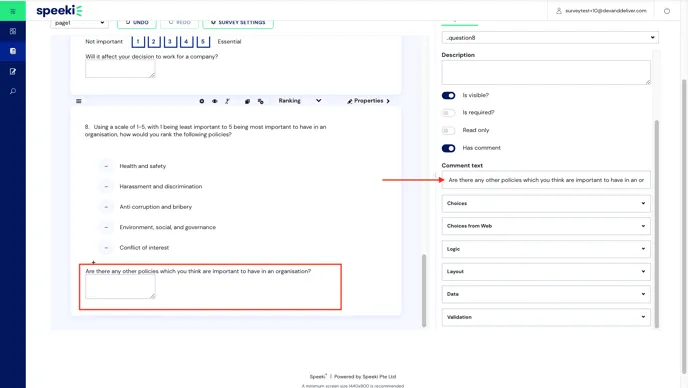
You can click on Properties to further configure other properties available for the Ranking question type. For example, you may want to ask for further comments from the respondents aligned with the question.
Adding an image picker question
You can add an Image Picker question type if you want your respondents to select an image from a list of options.
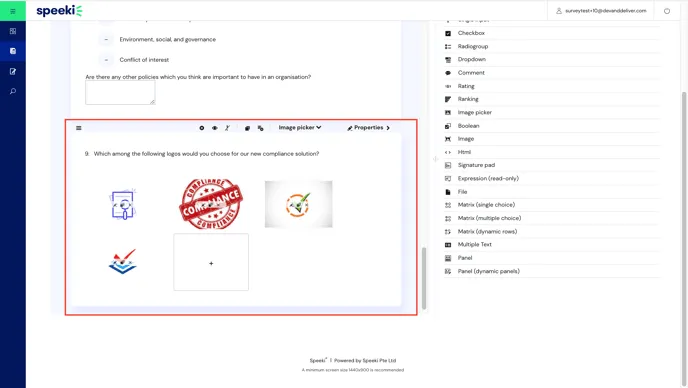
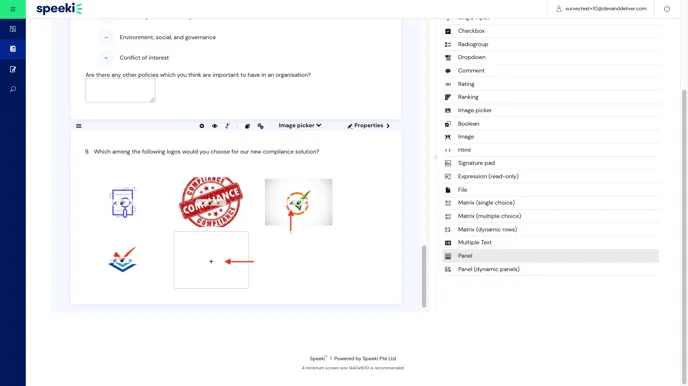
You can edit the image by clicking on the Edit icon on top of the image. You can other images by clicking on the + icon at the end of the list.
You can click on Properties to further configure other properties available for the Image Picker question type. For example, you may want to ask for further comments from the respondents aligned with the question.

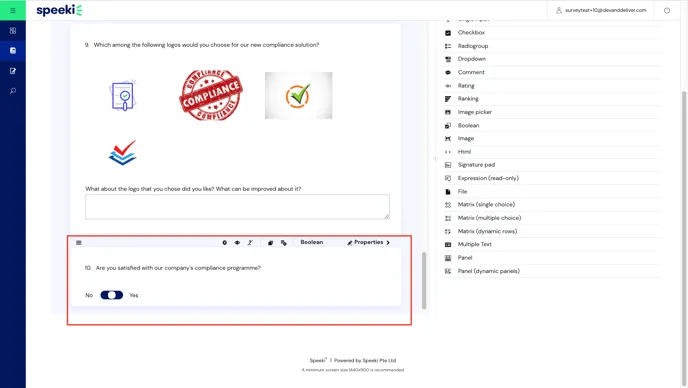
Adding a boolean question
You can add a Boolean question type if you are asking your respondents a question that require them to pick one out of two options. An example of this is a yes or no question.
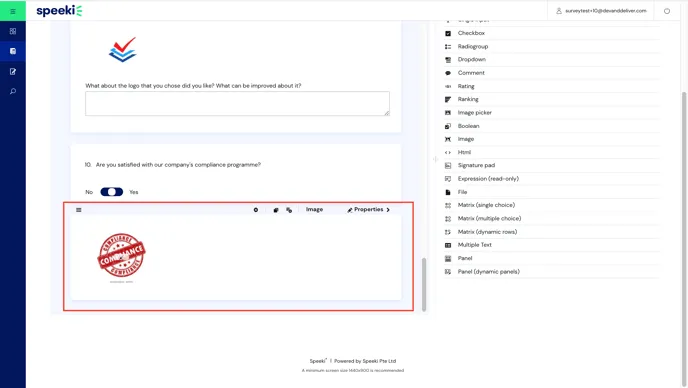
Adding an image question
You can add an Image question type if you want to include an image in your survey. You can use this as a reference for other questions or as a break in the flow of your questionnaire.
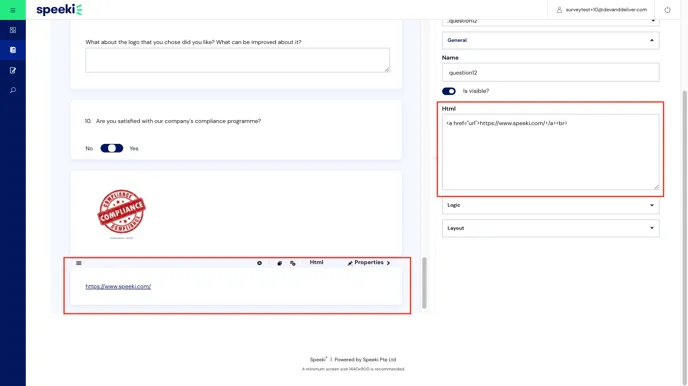
Adding an HTML question
You can add an HTML question type if you want to include link that your users can click on in your survey. When you add the HTML question type from the toolbox, you will notice that there is no field to directly edit on. To add a value, click on Properties and input value in the HTML field.
Adding a signature question
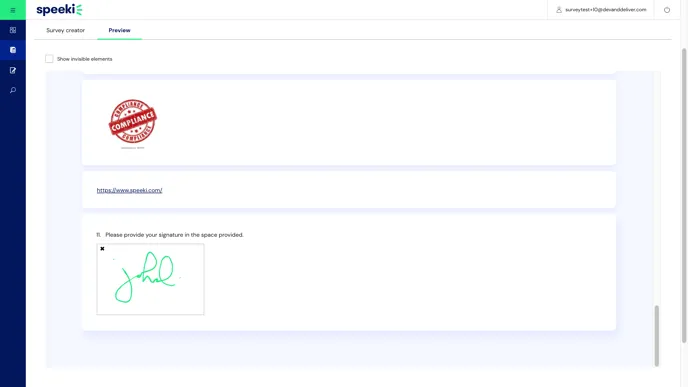
You can use the Signature Pad question type for getting e-signatures of respondents.
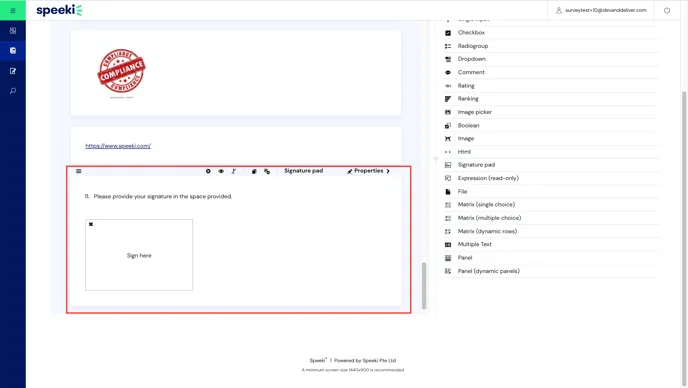
Viewing this question in Preview mode will allow you to test digitally inputting a signature as seen below.
Adding a file question
You can add a File question type if your intention is to get file uploads from your respondents. For example, getting a photo for identification.
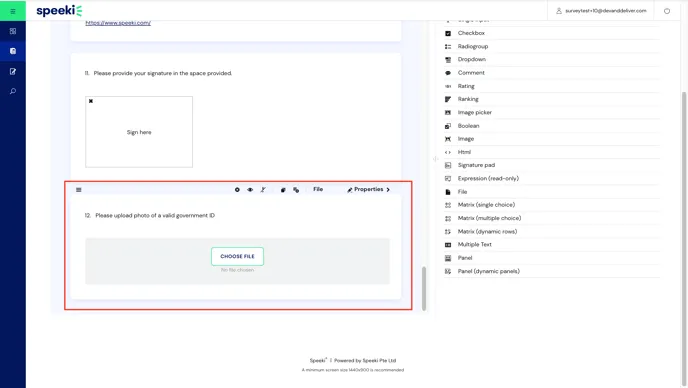
You will notice that you cannot click on the CHOOSE FILE button from Survey Creator, you can do this when you are in Preview mode. This is because the uploading is an action intended for your survey respondents.
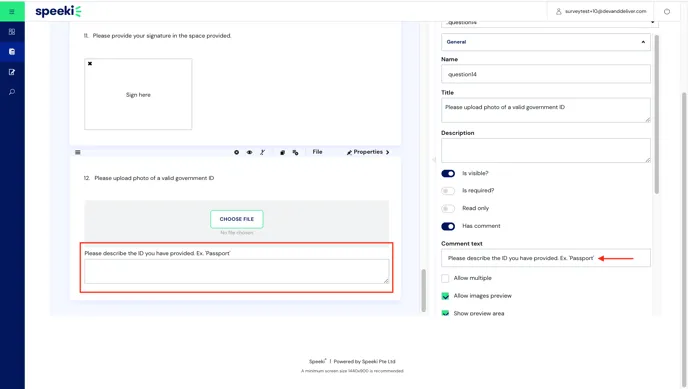
You can also click on Properties to configure the question type further.
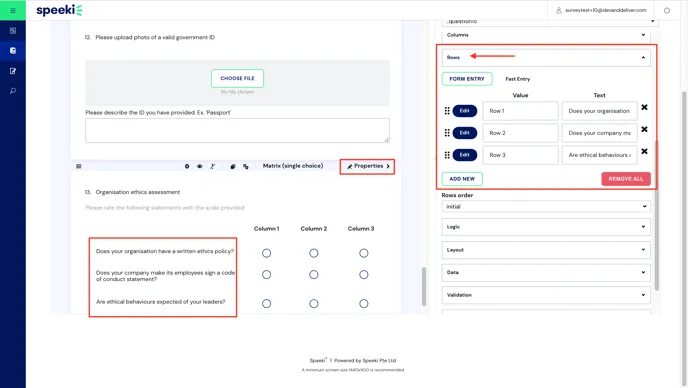
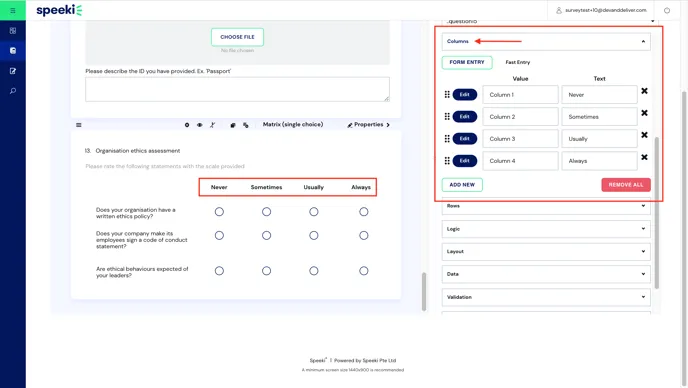
Adding a matrix (single choice) question
You can add a Matrix (single choice) question type if your intention is to ask users to choose a value from same columns for one or several rows. Or, for example, to choose from a set of rating for one or several questions.
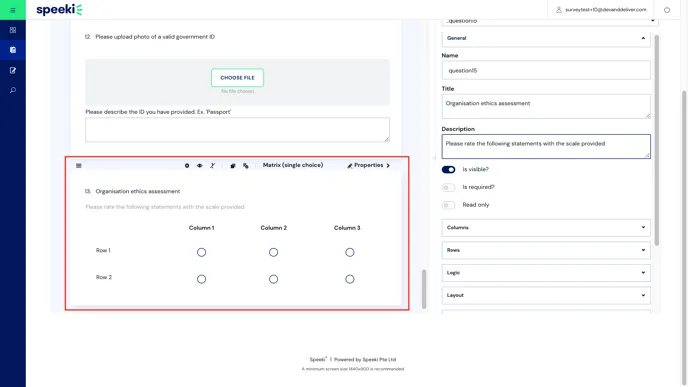
When you add a Matrix (single choice) question type from the toolbox, you will notice that you cannot edit the rows and columns immediately. To configure the question further, click on Properties and update the values for columns and rows.
Adding a matrix (multiple choice) question
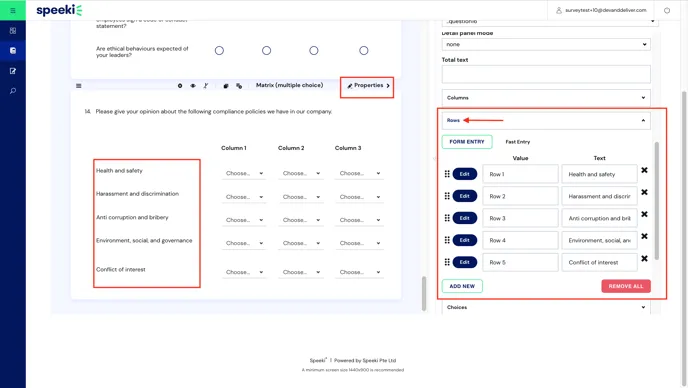
You can add a Matrix (multiple choice) question type to build a matrix with multiple choices for every column. Or, for example, to choose from ratings that have multiple choices, for one or several questions.

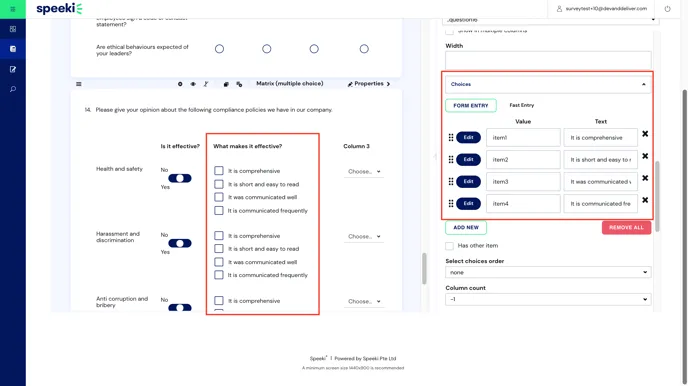
When you add a Matrix (multiple choice) question type from the toolbox, you will notice that you cannot edit the rows, columns, and column choices immediately. To configure the question further, click on Properties and update the values for the matrix.
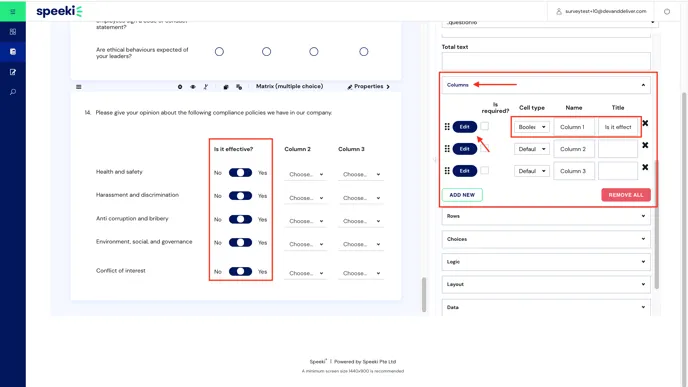
You may need more screen space to configure the matrix as in the case below for setting a choice as a radio group. To configure it further, click on edit. This will open a modal specifically for editing the column or row titles.
Adding a matrix (dynamic-row) question
You can add a Matrix (dynamic rows) question type to build a matrix with dynamic rows. Or, for example, to choose a subject (row) you want to subject to a response (column).
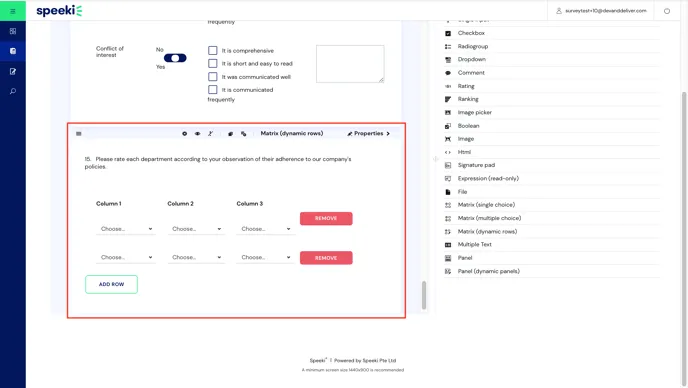
When you add a Matrix (dynamic rows) question type from the toolbox, you will notice that you cannot edit the rows, columns, and column choices immediately. To configure the question further, click on Properties and update the titles for the matrix.
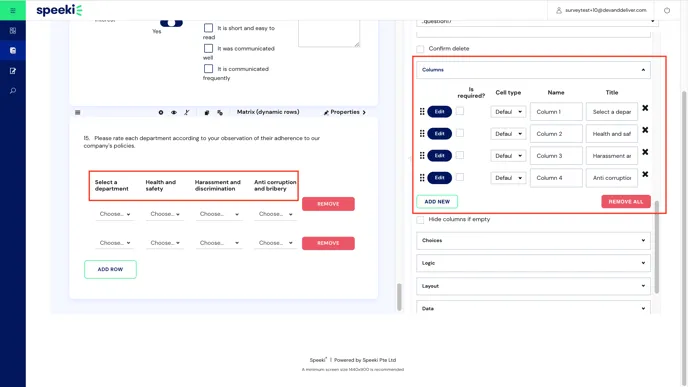
You may need more screen space to configure the matrix as in the case below for setting a choice as a dropdown. To configure it further, click on edit. This will open a modal specifically for editing the column and row titles.

There may be instances where you can only see the choices when they are in Preview mode, such as the example above. You will see the multiple choices when you are in Preview mode as seen below.
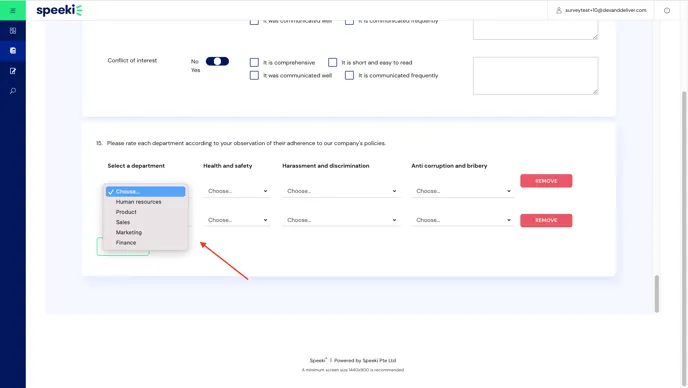
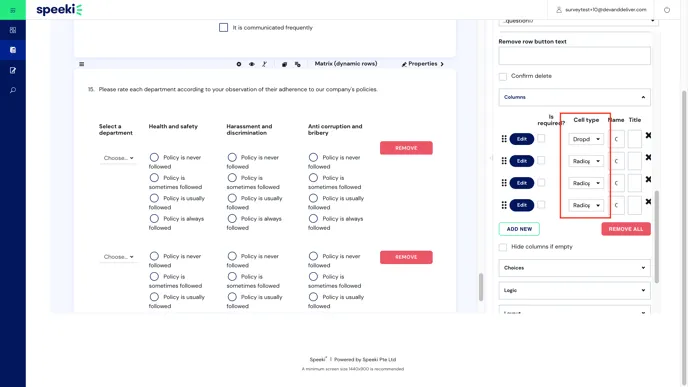
You can change the question type for a column or row by changing the Cell Type in Properties as seen below.
Adding a multiple text question
You can add a Multiple Text question type if you intend to get respondents from users without providing a set of possible answers. Or if you want to give your users and open text opportunity to provide their response.
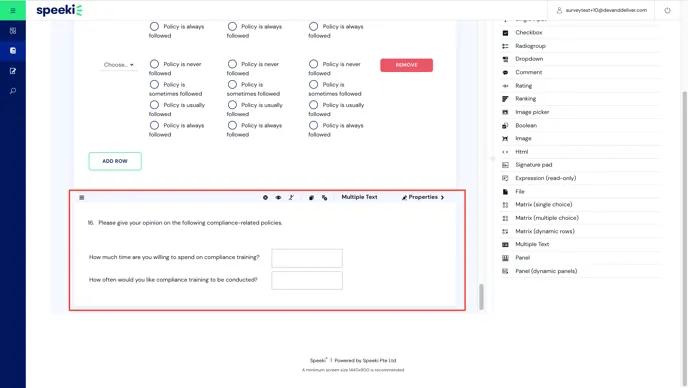
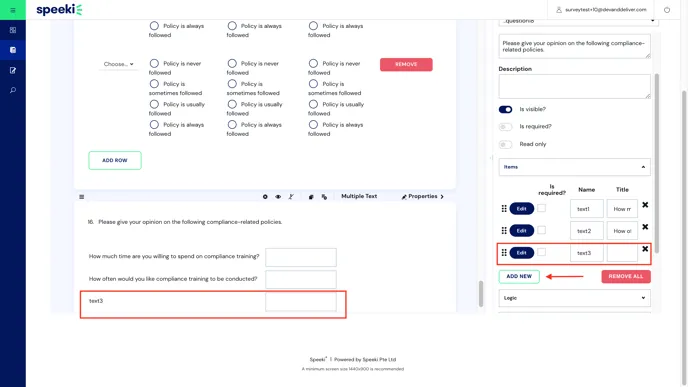
You can add more rows or questions by clicking on Properties and further configuring the question from there.
Adding a panel question
You can add a Panel question type if you want to contain several questions in one main question. This question type is useful for more complex questioning such as conditional questions for a specific topic, wherein a question will appear based on a user's answer of a previous question.
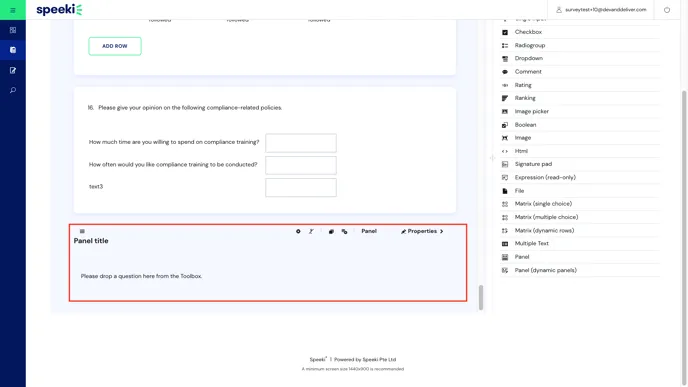
For example, as seen in the images below, you can start with a rating question.

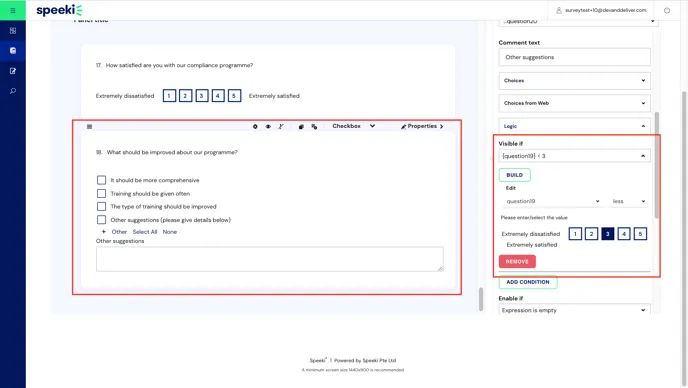
You can then add another question in the panel such as a checkbox question. You can further configure the properties, for example setting that the checkbox question should only appear if the answer to the rating question is less than 3, as seen in the image below.
Adding a page to your questionnaire and editing page title
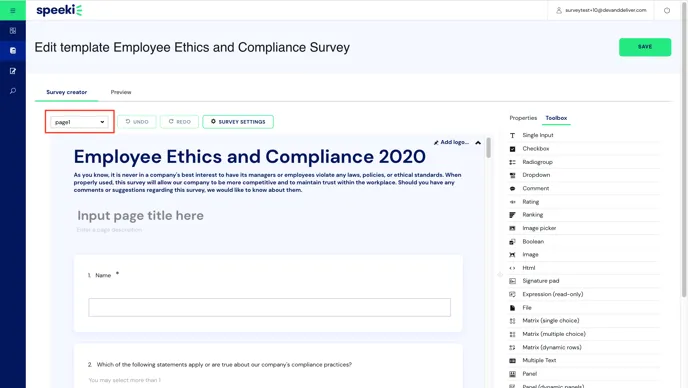
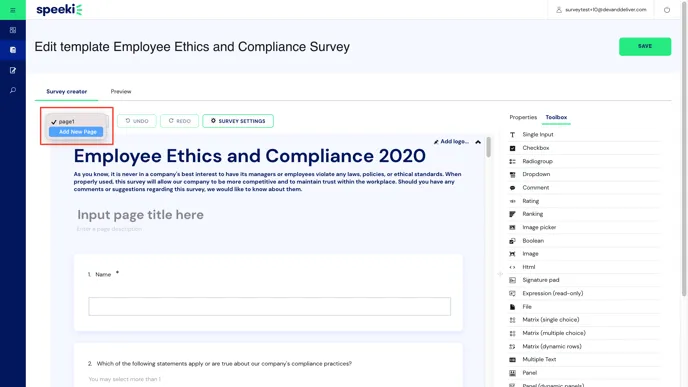
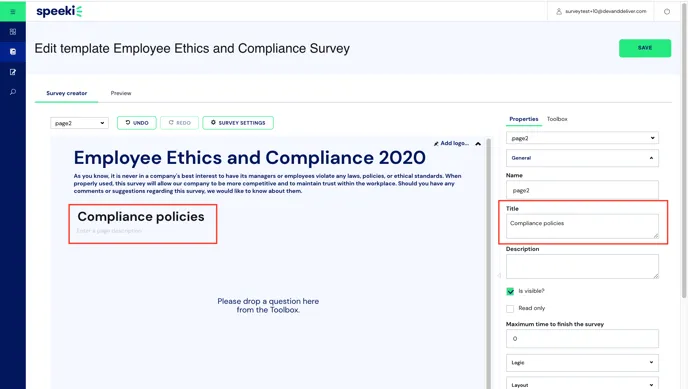
You can add a page to your questionnaire by clicking on the page dropdown and choosing Add New Page. You can use this for sectioning or separating your questions.
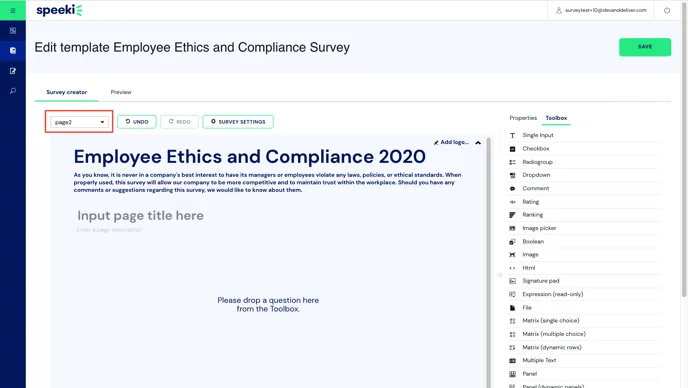
You can edit the title of your page by editing the placeholder for the page title in the questionnaire or by editing it from Properties.
Previewing your questionnaire
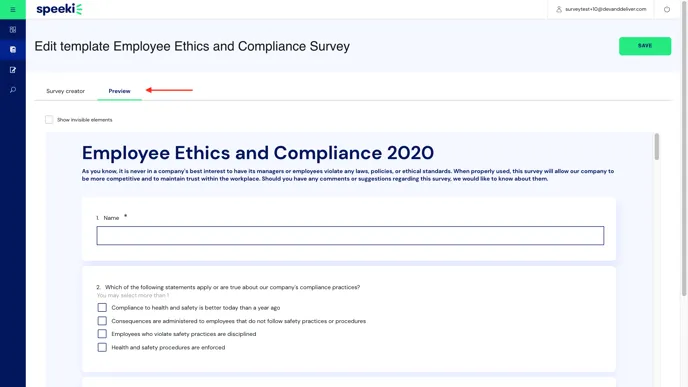
You can preview your questionnaire before saving it or sending it out as a survey by clicking on the Preview tab. Viewing your questionnaire in preview mode will allow you to see how your questionnaire would look like to your audience and may help you identify items you need to update or edit.
Saving your questionnaire
Click on Save to save your questionnaire as a template.
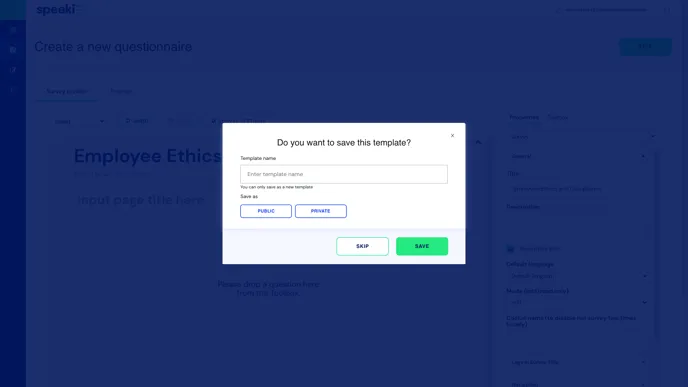
Saving your questionnaire as a template would require you to provide the following information:
- template name; and
- which type to save your template as
Template names must be unique. The system will give you an error message if the name you have inputted already exists.
Saving your template as a Public template means other users of the application will be able to see your template. This also means they can use your template to build their questionnaires or templates.
Saving your template as a Private template means the template is only visible to you.
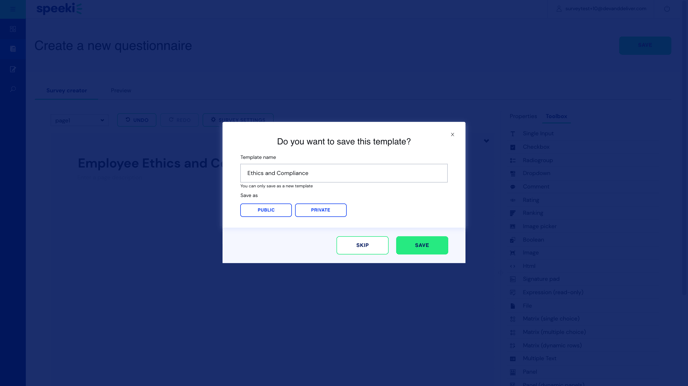
Clicking on SAVE in the modal will save your template. A successful save will redirect you to the My Templates page where you can see your template at the top of the list.
Choosing the SKIP will skip template saving and will direct you to the page for scheduling your questionnaire.
